
view와 controller를 완성시키자
1. HomeController
@Controller
public class HomeController {

	private static final Logger logger = LoggerFactory.getLogger(HomeController.class);

	/**
	 * Simply selects the home view to render by returning its name.
	 */
	@RequestMapping(value = "/", method = RequestMethod.GET)
	public String home(Locale locale, Model model) {
		logger.info("Welcome home! The client locale is {}.", locale);

		Date date = new Date();
		DateFormat dateFormat = DateFormat.getDateTimeInstance(DateFormat.LONG, DateFormat.LONG, locale);

		String formattedDate = dateFormat.format(date);

		model.addAttribute("serverTime", formattedDate );
		return "home";
	}
	@RequestMapping(value = "/home")
	public String homepage(Model model) {
		model.addAttribute("msg", "여기는 누구나 접근 가능한 페이지 입니다");
		return "welcome";
	}


}- 첫 화면은 : "/"->"home.jsp"로 이동한다

- 일반 페이지 가기를 누르면 "/home"을 controller에서 받아 welcome.jsp로 이동한다.

2. home.jsp / welcome.jsp
-> home.jsp
<%@ taglib uri="http://java.sun.com/jsp/jstl/core" prefix="c" %>
<%@ page contentType="text/html; charset=UTF-8" %>
<html>
<head>
	<meta charset="UTF-8">
	<title>Home</title>
</head>
<body>
<h1>
	Hello world!
</h1>

<P>  The time on the server is ${serverTime}. </P>

	<a href = "admin">관리자 페이지 가기</a>
	<a href = "dba">DB관리자 페이지 가기</a>
	<a href = "home">일반 페이지 가기</a>
</body>
</html>-> welcome.jsp
<%@ page contentType="text/html; charset=UTF-8" pageEncoding="UTF-8"%>
<%@ taglib prefix="c" uri="http://java.sun.com/jsp/jstl/core" %>
<!DOCTYPE html>
<html>
<head>
<meta charset="UTF-8">
<title>시큐리티 연습</title>
<script type="text/javascript">
   $(function(){

   });
</script>
</head>
<body>
	<h3>${msg }</h3>
	<a href = "${pageContext.request.contextPath }/">홈으로</a>
</body>
</html>3. dba와 admin 페이지도 완성시키자
	@RequestMapping(value = "/admin")
	public String admin(Model model) {
		model.addAttribute("msg", "관리자 전용 페이지 입니다.");
		return "admin";
	}
	@RequestMapping(value = "/dba")
	public String dba(Model model) {
		model.addAttribute("msg", "DB관리자 전용 페이지 입니다.");
		return "dba";
}-> dba.jsp
<body>
	<h3>${msg }</h3>
	<hr/>
	<hr/>
	<a href = "${pageContext.request.contextPath }/">홈으로</a>
</body>-> admin.jsp
<body>
	<h3>${msg }</h3>
	<hr/>
	<hr/>
	<a href = "${pageContext.request.contextPath }/">홈으로</a>
</body>이렇게 컨트롤러와 view를 완성하면
-> 첫화면

-> 일반페이지 가기 누르면

-> 관리자 페이지 가기(admin)

-> DB관리자 페이지 가기
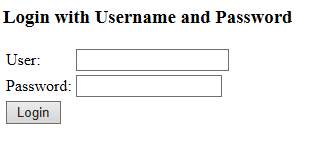
분명 login에 대한 view는 만들지 않았다.
이를 스프링 시큐리티가 자동으로 만들어 준다는 것이다.
login.jsp로 이동한다.
root-context에 security:form-login 요렇게 설정을 해두었기 때문이다.(맞는지 자세히 모르겠다)
4. 아이디 or 비밀번호가 일치하지 않을 경우
root-context.xml 에서 /Access_Denied 로 이동하는 설정을 세팅해놓았다.
- controller 작성
	@RequestMapping(value = "/Access_Denied")
	public String Access_Denied(Model model) {
		model.addAttribute("msg", "등록되지 않은 사용자이거나 비밀번호가 일치하지 않습니다.");
		return "Access_Denied";
}- view 작성(Access_Denide.jsp)
<body>
	<h3>${msg }</h3>
	<a href = "<c:url value = "/" />">홈으로</a>
</body>다 완성한거 같으나
- 로그아웃 기능
- 유저의 정보를 얻어내는 기능을 추가해보자
5. 유저이름 정보를 얻어보자
- controller에 인증 정보를 얻어오는 method를 만든다.
// 인증 정보를 얻어내는 method
	private String getPrincipal() {
		String username = "";
		Object object = SecurityContextHolder.getContext().getAuthentication().getName();
		if(object instanceof UserDetails) {
			username = ((UserDetails) object).getUsername();
		}else {
			username = object.toString();
		}
		return username;
}- Controller에 home, hompage, admin, dba 메서드에
model.addAttribute("user", getPrincipal());을 공통적으로 넣어준다. 접속하는 유저의 이름이 getPrincipal()을 통해 알아내었고, 이를 model.addAttribute하여 넘겨준다.
${user} 이렇게 사용할 수 있다는 것이다.
-> home.jsp , admin.jsp, dba.jsp, welcome.jsp 에 공통적으로 삽입하여
현재 사용자를 알아낼 수 있고 이를 확인까지 가능하다.
	<hr/>
	현재 사용자 : ${user }<br/>
<hr/>첫 화면을 들어가면

anonymousUser 라고 나온다.
이를 이용해서 로그아웃을 만들어주자
6. 로그아웃을 만들어보자
-> home.jsp를 수정
<%@ taglib uri="http://java.sun.com/jsp/jstl/core" prefix="c" %>jstl 코드를 추가
	<c:if test = "${user != 'anonymousUser' }">
		<a href = "${pageContext.request.contextPath }/logout">로그아웃</a>
	</c:if>
	<c:if test = "${user == 'anonymousUser' }">
		<a href = "${pageContext.request.contextPath }/login">로그인</a>
</c:if>user가 anonymousUser라면 로그인 창이 띄워져야 할 거시고
user가 anonymousUser가 아니라면 로그아웃 창이 띄어져야 한다.
login.jsp는 만들지 않았지만 스프링 시큐리티가 만들어 준다.
로그인으로 이동하고
로그아웃 처리만 해주면 끝이다.
- 컨트롤러에 "/logout"을 설정해주자
	@RequestMapping(value = "/logout")
	public String logout(HttpServletRequest request, HttpServletResponse response) {
		// 시큐리티를 이용하여 정보를 얻어 인증 정보를 얻어낸다.
		Authentication authentication = SecurityContextHolder.getContext().getAuthentication();
		if(authentication!=null) { // 인증 정보가 있으면
			new SecurityContextLogoutHandler().logout(request, response, authentication); // 로그아웃을 시킨다.
		}
		return "redirect:/";
}HttpServletRequest, HttpServletResponse 타입으로 requset, response를 가져오고
인증정보를 Authentication authentication = SecurityContextHolder.getContext().getAuthentication();
받아와서 인증 정보가 없다면 로그인이 되어 있지 않는 것이고, 인증 정보가 있다면 로그인이 되어있는 것이다.
시큐리티를 사용하여
new SecurityContextLogoutHandler().logout(request, response, authentication);
로그아웃을 시킨다.
그리고 다시 home.jsp 화면으로 redirect 시키면 끝이다. "/"을 입력했을 시 home.jsp로 이동한다.

id: admin, pw: 1234 입력

로그아웃을 누르면

로그아웃 버튼이 없어지고, 로그인 버튼이 나타난다.
그리고 현재 사용자가 : anonymousUser 로 바뀐다.
'SpringMVC' 카테고리의 다른 글
| Spring Legacy Project (회원관리 - 실습2) (0) | 2021.09.28 |
|---|---|
| Spring Legacy Project (회원관리 - 실습1) (0) | 2021.09.28 |
| Spring Web Security (4) - Oracle 연동 (0) | 2021.09.27 |
| Spring Web Security (3) - Custom Login Form(XML) (0) | 2021.09.27 |
| Spring Web Security (1) (0) | 2021.09.27 |